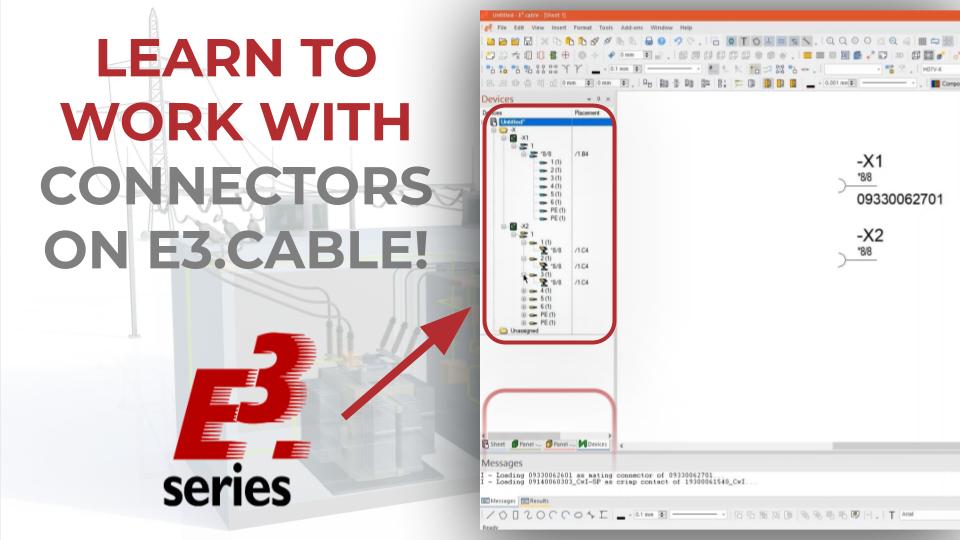
In this article you can learn how to work with connectors with inserts in E3.cable. The new features of the E3.series 2021 bring the options to position the inserts as a group of pins or a complete device. See the full video article and optimize your processes!
Connector Selection and 3D View
Initially, the desired connector is selected from the database. The name of the connector and its supplier are specified below:
- 09330062701
- Harting
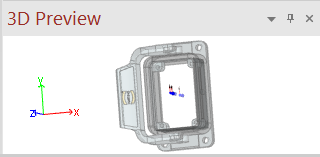
Connector 3D View
When clicking on the database items the 3D visualization option is presented for the component. You can move, rotate and select different views to view the part.
Try NOW the industry-leading E-CAE E3.series tool in the world with technical training courses!
Click on the banner below
Connector Insertion
Then the connector is added as a group of pins (for your insertion) and also as a complete device. For this, with the right mouse button click on the component, the options of "Place Insert as Pingroup" and "Place Complete Device" are selected.
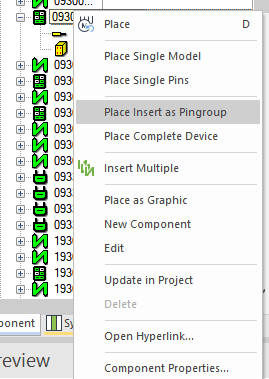
"Place Insert as Pingroup" and "Place Complete Device" options for a connector on E3.series.
Watch the Full Video
Subscribe to our Youtube channel here for more technical videos.
Differences between Options
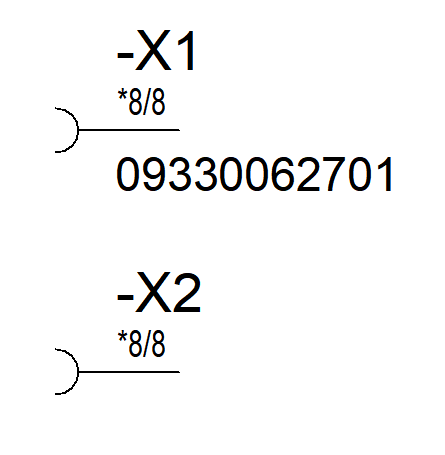
With the command "Place Insert as Pingroup", a symbol is placed for each connector and insert contained in the selected connector / insert, which represents all the pins. In the example, as the device has only one symbol, a single symbol has been added with all pins. If there were more symbols, they would be added.
Differences between features
With the command "Place Complete Device", a symbol is placed with all the pins contained in the selected connector / insert.
In the example, the command places a symbol grouping all the pins.
We can see the differences in the project's device table.
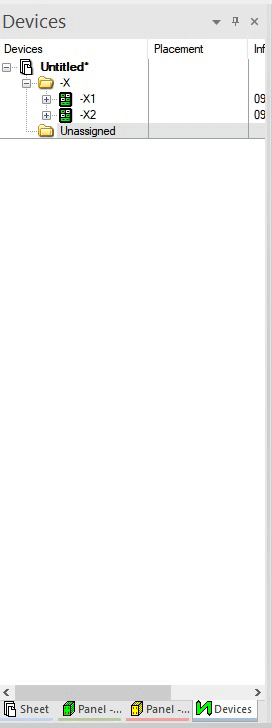
Differences between the options in the device table
Make the E3.series Trial according to your demand using the button below!

Are you a Student?
Download E3.series for free!